Adding New Subscribers to Your Mailing List
There are many different ways to add your subscribers to your list. One method is described below. Probably the easiest way to add your subscribers is to simply log in to your control panel and paste in your subscribers under Add Many Members.
If you have many subscribers to add to your list or you also desire to include various demographic information with field values such as Client, Prospect, ZipCode, State, AreaCode, ItemBought, AmountPurchased, Paid, FreeTrial, ExpireDate, Gender, MaritalStatus, Birthday, etc. the best way to do this is by creating and importing the data from a .CSV file (comma separated value). One reason to do this is so that you can subsequently query on this information to create different segments that you can send mail to. Another reason is so that you can perform a mail merge with this information in order to automatically insert these values into your email messages.
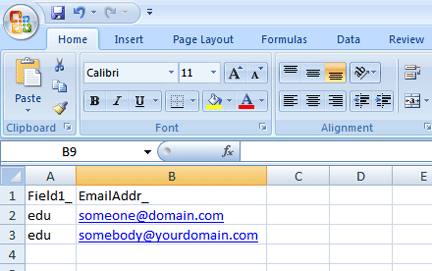
- Create a .csv file
Note:To create a .csv file it is best to use Microsoft Excel or a similar program. When saving an Excel file, your file must be saved as a .csv. To do this click File and Save As. Choose CSV (comma delimited) *csv. from the Save As Type drop down menu located at the bottom of the window, then click Save - In row 1 enter the custom fields you would like to use, see How to Create a Segment for a list of available fields
- In the columns available, add any information that you would like to segment by
Download these example Excel files to help you create your own.
Professional Level Sample CSV File(includes 6 extra fields)
Enterprise Level Sample CSV File (includes 35 extra fields)
Note: Remember to follow instructions above to convert file to .csv format. Do not change the values in Row 1, these values are necessary to import your subscriber information.
4. Adding Subscribers to Your List by .CSV Import
Once your .csv file is ready, you can import your subscriber information to the mail server. While logged into the Net Atlantic control panel:
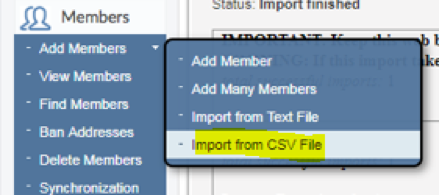
- Click on Members
- Mouse over Add Members to open the dropdown menu
- Choose Import from CSV File
- Select Use types setting in CSV file, in the Action section if import contains MemberType_.
- The Update existing members?: section only needs to be checked if you are updating information for members already in your list. If these are new email addresses you can select "no".
- Terminate Import, You can select "Do not terminate import due to malformed addresses".
- Click on Browse and locate the .csv file you created
- Click Next where you will be brought to the Mapping Fields section
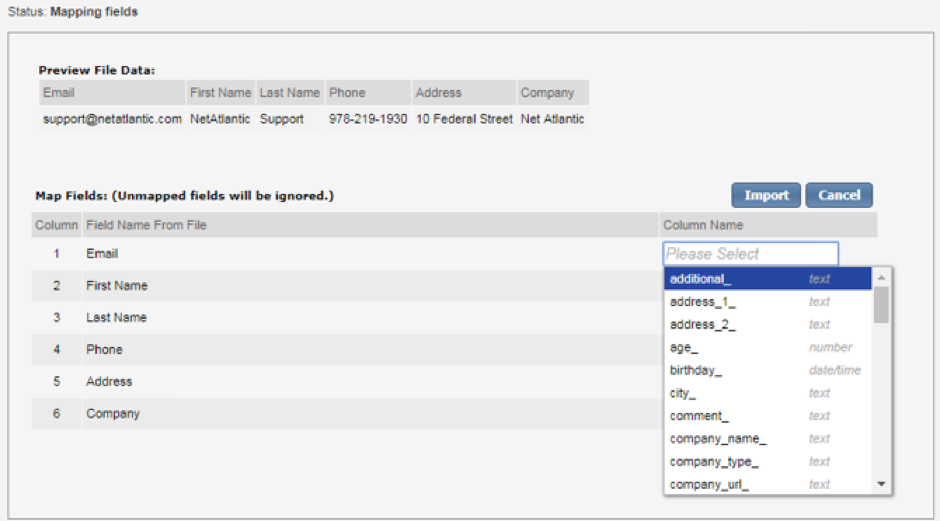
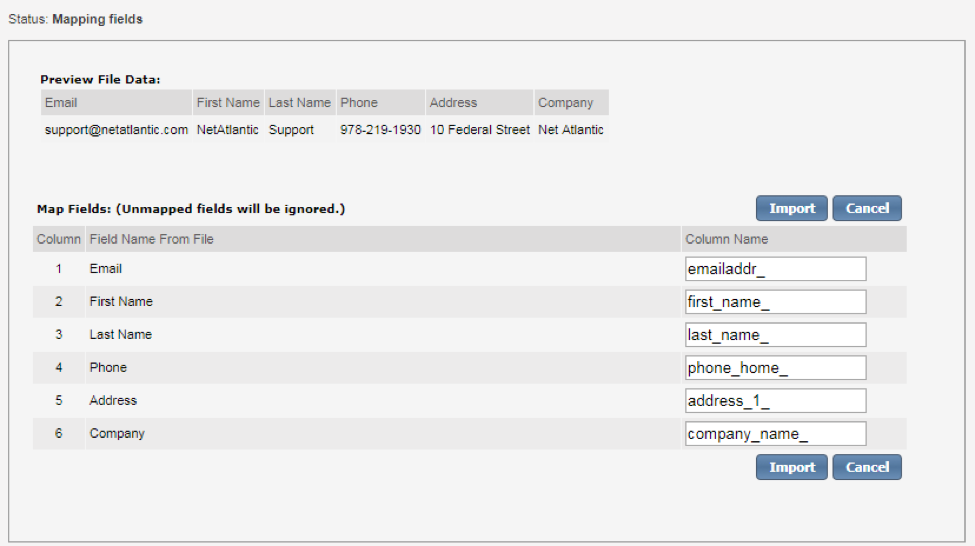
- Here you can click in the Column Name section where you will select the corresponding field for each column on the imported file.
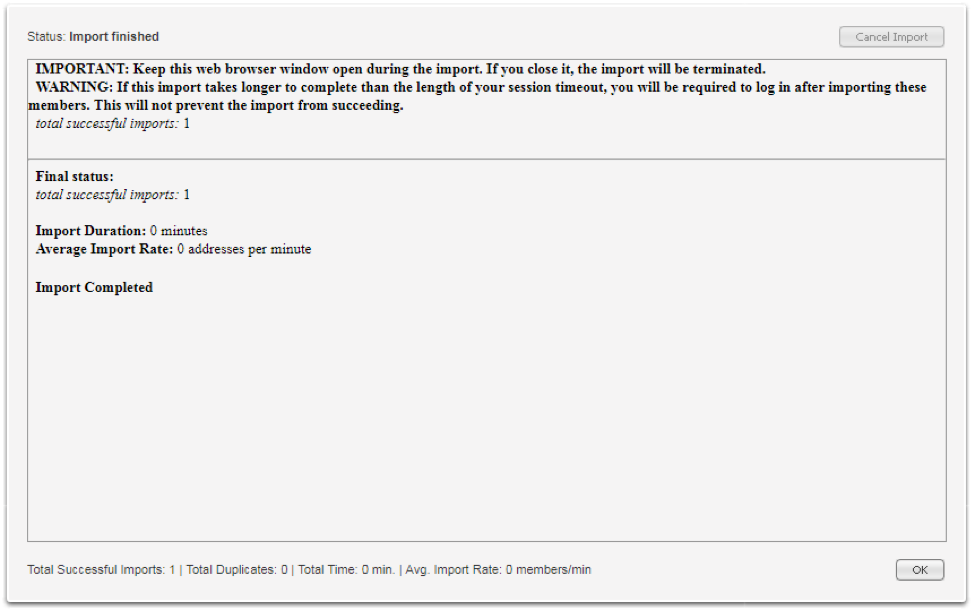
- Once you have completed your field mapping as shown above you will then click on import to complete the process.
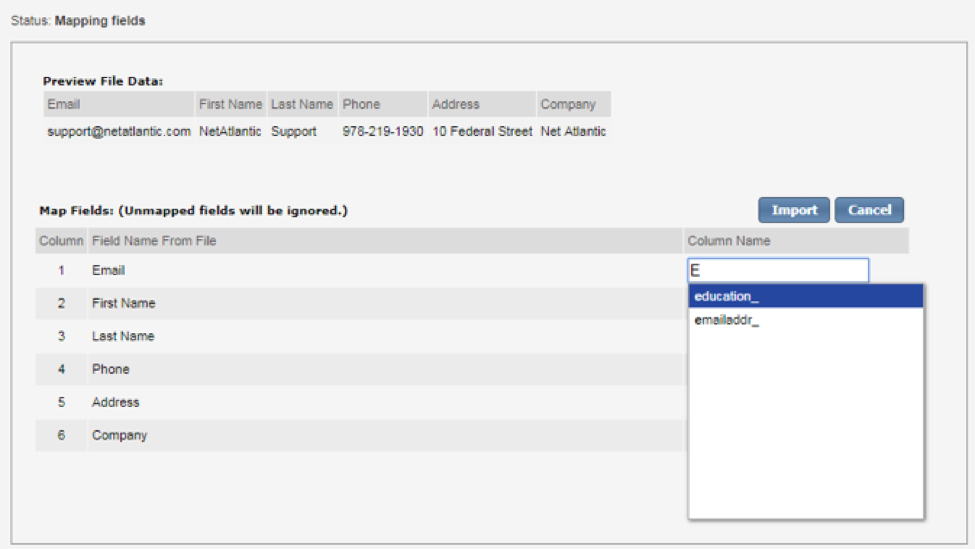
If you know the Column name you would like to map to, you can start typing the name and are displayed a list of matching fields for you to select from.
Completed Field Mapping shown below:
